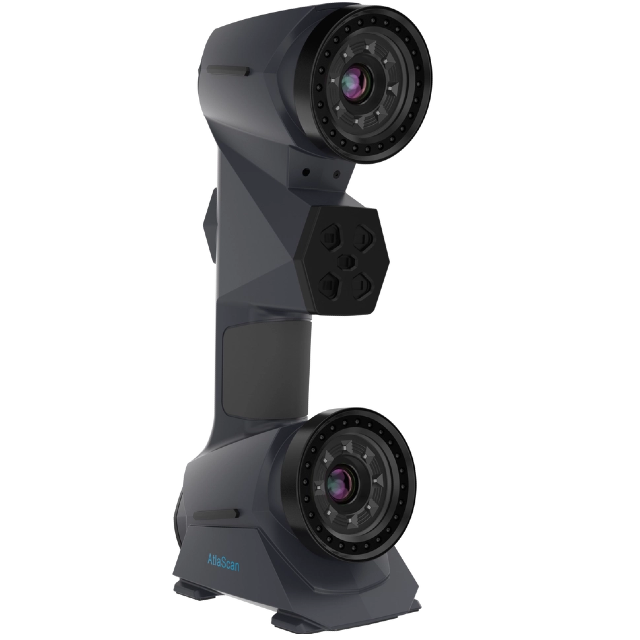
In today’s rapidly advancing industrial world, precision plays a critical role in ensuring high-quality products and minimizing errors. As manufacturing processes become increasingly complex, the need for accurate, efficient, and reliable measurement technologies is paramount. This is where high-accuracy 3D scanners come into play. These scanners have become invaluable tools for industries that require exact specifications and flawless quality control.
ZG Technology, a leading provider of metrology-grade 3D scanning solutions, offers an innovative range of high-accuracy industrial 3D scanning products designed to help businesses achieve micron-level precision in their manufacturing processes. In this comprehensive guide, we will explore how these state-of-the-art scanners are revolutionizing the world of industrial quality control and how they can help businesses streamline their production, reduce errors, and enhance the overall quality of their products.
What Does “High-Accuracy” Mean in Industrial 3D Scanning?
In the realm of industrial 3D scanning, accuracy is everything. But what exactly does "high-accuracy" mean, and why is it so important for quality control?
A high-accuracy 3D scanner is defined by its ability to capture minute details of an object or surface with exceptional precision, often down to the micron-level (one-millionth of a meter). In some industries, even the smallest deviations in measurement can have significant consequences, which is why the ability to detect these minuscule changes is crucial.
A typical sub-millimeter scanner provides accuracy within a few hundredths of a millimeter, while micron-level scanners go much further, offering resolutions as small as 0.001 mm. This precision allows manufacturers to detect even the smallest imperfections in their products. For example, in industries like aerospace, automotive, or medical device manufacturing, a part with just a 0.1mm error could cause misalignments, leading to performance issues, safety risks, or product failure.
Moreover, the key to high-accuracy 3D scanning lies not only in the precision of individual measurements but also in the consistency of those measurements over time. Whether you’re inspecting a single part or thousands of components, the scanner must provide the same level of accuracy throughout the production process.
How High-Accuracy 3D Scanners Improve Quality Control
High-accuracy 3D scanners provide numerous advantages over traditional inspection methods, significantly improving the efficiency and effectiveness of quality control processes in manufacturing.
Comprehensive Data Capture vs Traditional Sampling
One of the primary benefits of 3D scanning is the ability to perform comprehensive data capture. Unlike traditional measurement methods, which typically rely on a small sample size of measurements from a part, 3D scanners create a full digital replica of the object being scanned. This means that instead of relying on just a few contact points or visual inspections, a 3D scanner captures thousands of data points in a single pass.
This results in a complete, accurate representation of the part’s surface geometry. By using this full data set, manufacturers can ensure that no defects are missed. This also speeds up the inspection process by eliminating the need for time-consuming sampling and manual measurement, making it far more efficient.
Detecting Small Defects and Improving Risk Detection
Another significant advantage of high-accuracy 3D scanners is their ability to detect even the smallest defects that might be invisible to the naked eye or overlooked using traditional methods. For instance, 3D scanners can detect micro-cracks, surface inconsistencies, or dimensional inaccuracies as small as a micron, which can help manufacturers address quality issues before they become costly problems.
This ability to detect defects at an early stage improves risk management by minimizing the chances of faulty products reaching the customer or assembly line. Early defect detection also helps to reduce rework and scrap costs, ultimately improving profitability.
Speed and Automation: A Comparison to Traditional Tools
The speed and efficiency offered by high-accuracy 3D scanners cannot be overstated. While traditional inspection methods can be slow, labor-intensive, and prone to human error, 3D scanners automate the process, delivering fast, repeatable results. Once a product is scanned, the data can be analyzed instantly, and comparisons can be made against the design specifications in real time.
This not only reduces the inspection time but also enhances overall productivity. With ZG Technology’s 3D scanners, manufacturers can integrate scanning into their automated production lines, enabling continuous quality monitoring without disrupting operations.

Key Technologies Enabling Micron-Level Precision
To achieve the micron-level precision that is essential in industrial quality control, various advanced technologies are used in the design of 3D scanners. These include:
Laser Triangulation
Laser triangulation is a widely used technique in 3D scanning that involves shining a laser beam onto a surface and measuring the reflected light. The scanner calculates the distance to the surface based on the angle of the reflected light, allowing for extremely precise measurements. This method is commonly used in industries that require high accuracy, such as aerospace and automotive manufacturing.
Structured Light Scanning
Another technology used to achieve micron-level precision is structured light scanning. This method projects a series of light patterns onto an object’s surface. By capturing how these patterns distort when they interact with the object’s shape, the scanner creates a detailed 3D map of the surface. Structured light scanning is particularly effective for scanning complex, curved, or intricate geometries, making it ideal for industries such as healthcare and industrial design.
White Light Scanning
White light scanning is another technique that uses a series of light patterns to capture a 3D image of an object. Unlike structured light, which typically uses a monochromatic light source, white light scanners utilize a broad spectrum of light, making them well-suited for delicate surfaces and applications where accuracy is paramount.
Data Processing Software and Measurement Repetition
Once the data is captured by the scanner, data processing software comes into play. This software is responsible for transforming the raw data into a usable 3D model, correcting distortions, and providing the level of precision required for industrial applications. Furthermore, the software ensures that measurements are repeatable and accurate across multiple scans, providing manufacturers with consistent results.
Industrial Case Examples Where Precision Matters Most
The applications of high-accuracy 3D scanning are vast, but certain industries benefit more than others due to the critical need for precision in their operations.
Aerospace
In the aerospace industry, 3D scanning plays a vital role in ensuring the safety and reliability of parts. Turbine blades, airframes, and other critical components are scanned to ensure that they meet the exact specifications required for safe flight. Even the smallest defects can have catastrophic consequences, making high-accuracy 3D scanners essential for rigorous quality control in aerospace manufacturing.
Automotive
The automotive industry uses 3D scanning to verify that components like engine parts, chassis, and molds meet the required tolerances. By scanning components in the manufacturing process, 3D scanners can detect any deviations from the design specifications early, preventing costly rework or delays in production.
Medical Devices
For medical devices like prosthetics and implants, precision is critical to ensure that the device fits perfectly and functions as intended. 3D scanning is used to create highly accurate digital models of these devices, which are then used to produce custom-made implants and prosthetics that fit patients’ unique anatomical structures.
Choosing High-Accuracy 3D Scanners for Quality Control Workflows
When selecting a high-accuracy 3D scanner for your manufacturing or quality control process, several factors should be considered:
Integration with Production Lines
A key factor in choosing a high-accuracy 3D scanner is how well it integrates with your existing production lines. Whether you need to scan parts in-line or offline, the scanner should fit seamlessly into your existing workflows without slowing down production.
Repeatability and Calibration
For consistent, reliable results, the scanner must be capable of producing the same high-precision measurements every time. The scanner’s repeatability and ease of calibration are essential to ensure that measurements remain accurate over time and across multiple production runs.
Environmental Adaptability
Many industrial environments can be harsh, with factors such as dust, temperature fluctuations, and vibrations affecting the accuracy of measurement devices. Therefore, the scanner must be capable of operating under these conditions while maintaining high performance.
Versatility Across Materials and Applications
A high-accuracy 3D scanner should be versatile enough to handle a wide variety of materials and applications. Whether you're scanning metal parts in the automotive industry or delicate medical devices, the scanner must be adaptable to your needs.
Conclusion
As industries continue to push for higher levels of precision, high-accuracy 3D scanners are becoming indispensable tools in quality control. By enabling manufacturers to achieve micron-level precision, these scanners not only improve product quality but also reduce the risk of defects, minimize waste, and increase efficiency across the entire production process.
For businesses looking to stay ahead of the competition, adopting industrial 3D scanning solutions is a crucial step. At ZG Technology, we specialize in providing cutting-edge 3D scanning technology to help you achieve the highest standards of quality control. Contact us today to learn more about how our high-accuracy 3D scanners can help enhance your production processes and ensure the highest level of product quality.
FAQ
What is the difference between high-accuracy 3D scanners and regular 3D scanners?
High-accuracy 3D scanners are designed for micron-level precision, making them ideal for applications that require highly detailed measurements, such as aerospace and automotive manufacturing.
Can a high-accuracy 3D scanner detect defects in complex parts?
Yes, high-accuracy 3D scanners are capable of detecting small defects, such as micro-cracks or dimensional inaccuracies, that might be missed with traditional methods.
How does 3D scanning improve the quality control process?
3D scanning allows for comprehensive, automated inspections of parts, providing faster and more accurate results compared to traditional manual measurement methods.
What industries benefit from using high-accuracy 3D scanners?
Aerospace, automotive, medical device manufacturing, and industrial production all benefit from the precision and reliability offered by high-accuracy 3D scanners.


